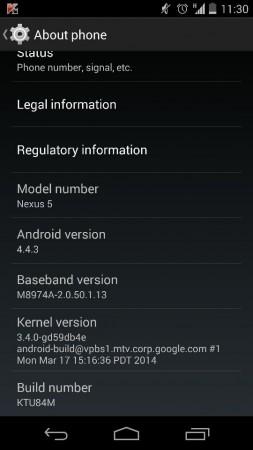
The search engine giant, Google's Android team has already released the factory image for Google-LG Nexus and is slowly rolling out the update via OTA in phases.
Users, who have not received (via OTA) or installed the factory image, can root the Nexus 5 with simple CF-Auto-Root tool (developer, Chainfire).
Pre-requisite (things to remember before the rooting the smartphone):
- Rooting enables users to install custom ROMs or third party apps of their choice and also be able to perform tweaks in the setting to improve the device's performance, though the user get more control over the smartphone, company's warranty stands void and will no longer be liable for future updates [warranty can be restored simply by flashing the device with stock-ROM].
- Nexus 5 Bootloader must be unlocked
- Rooting of devices leads to complete data wipe out, so make sure to back all the data.
- Users make sure you have installed USB drivers on the PC to connect your Google-LG Nexus 5. [Download USB driver, here]
- Make sure your smartphone has more than 80-percent battery.
[Disclaimer: This procedure is very technical and should be performed by a person with sound knowledge of rooting (or manual software installation) of Android devices. If the step-by-step installation process is not followed properly, there are chances of the smartphone getting bricked or may even lead to the device being permanently irreparable. International Business Times, India Edition cannot be held responsible for any damage or claims from readers if the procedure does not yield the required results or if smartphones get bricked. Hence users are advised to proceed with caution.]
Step-by-step installation procedure of Android v4.4.4 KitKat firmware rooting for Google Nexus 5 via CF-Auto-Root:
Step 1: Download Android SDK (software Development Kit) and install the software in to your PC (for more information, click here).
Step 2: Enable USB Debugging mode on the phone.
[Go to Settings >> Developer options >> tap USB debugging]
[Note: Before plugging the phone to the computer, be sure you have installed USB driver software, if not, click here to download firmware]
Step 3: Download Fastboot (here) and put the .zip file in to android-sdk-windowsplatform-tools directory. [Note: If there is no such directory in the PC, create one]
Step 4: Now, download CF-Auto-Root application tool in to your PC, to be installed later in Google-LG Nexus 5 phone.
Step 5: Then connect the Google-LG Nexus to the PC via USB cable, then turn off the phone.
Step 6: Now, initiate Fastboot/Bootloader mode sortie on the phone by holding 'volume up + volume down + power buttons, until we see the fastboot menu and start button on the screen.
Step 7: Then go to the downloaded file- CF-Auto-Root location (inside fastboot directory >> Android SDK folder)
Step 8: After finding the CF-Auto-Root file, type-in commands based on your PC OS
For Windows:
>> Run root-windows.bat
For Linux:
>> chmod +x root-linux.sh
>> Run root-linux.sh
For Mac OS X:
>> chmod +x root-mac.sh
>> Run root-mac.sh
Step 9: After the codes are entered, the installation begins and follow the instructions accordingly.
Step 10: This process might take around five minutes to complete and once the installation is completed, you can check in the settings >> About Phone >> system updates.
To make sure the installation is complete, users can either use SuperSU (developer, Chainfire) app or Root Checker app (both are available at Google Play Store.).
[Credits: Team Android]


